An anchor for a storefront
signcraft.com/articles/2022/06/an-anchor-for-a-storefront
By Ken Spencer
Posted on Sunday, June 5th, 2022
Sometimes you have an idea before you have a customer for it. That was the case here. Being in a coastal area, there are plenty of businesses with a marine slant. I always thought a giant anchor poking through the building would be an eye-catcher.
I pitched it to a couple of folks who came to me for signs that had the word “anchor” in their names, but had no takers. The third customer loved the idea instantly. He has a restaurant called The Anchor at Newport Brewing.
It’s not so much a sign as it is a powerful graphic for their storefront. Social media has made graphics like this even more powerful for advertising. People like to get their photo taken with the anchor or the sign, and they usually post those on social media. The photos become ongoing, high-value advertising for the business.
The first step was creating a scale mockup of the project. I took photos of the building and cut out a scale anchor. It took quite a bit of design work on the computer to have an anchor that would look right on the building, yet also be big enough to look like it’s crashing through the corner.
With this information, I was able to build the model and show the customer the scope. I think he originally thought there would be this smallish anchor sticking out of the building. I wanted to create something big that patrons wanted to have their picture taken in front of.
Once cut, it was just a matter of gluing the pieces together while incorporating the stainless tubing into the construction. The tubing is placed into the voids of the HDU and tacked with the welder. It was removed and properly welded before being reinserted and enclosed.
It was cool to see the anchor emerge, but I was concerned that it didn’t look quite right. It was too rigid, too stiff. But I was able to shape it with belt sanders and angle grinders. (There are some great carving tools available for the angle grinder if you don’t mind being knee deep in HDU dust and shavings.)
With the installation and position worked out it was time to paint. The anchor got a few coats of primer and a rust-colored base coat before applying Modern Masters reactive iron paint. It got a few coats of that before getting hosed down with the reactant, which causes the paint to rust. It’s a very bright rust, but once the sealer and UV clear coat go on, it dries to a deep, authentic color.
It is also anchored at the roofline. I thought it would be very heavy, but it was actually fairly light at 140 pounds.

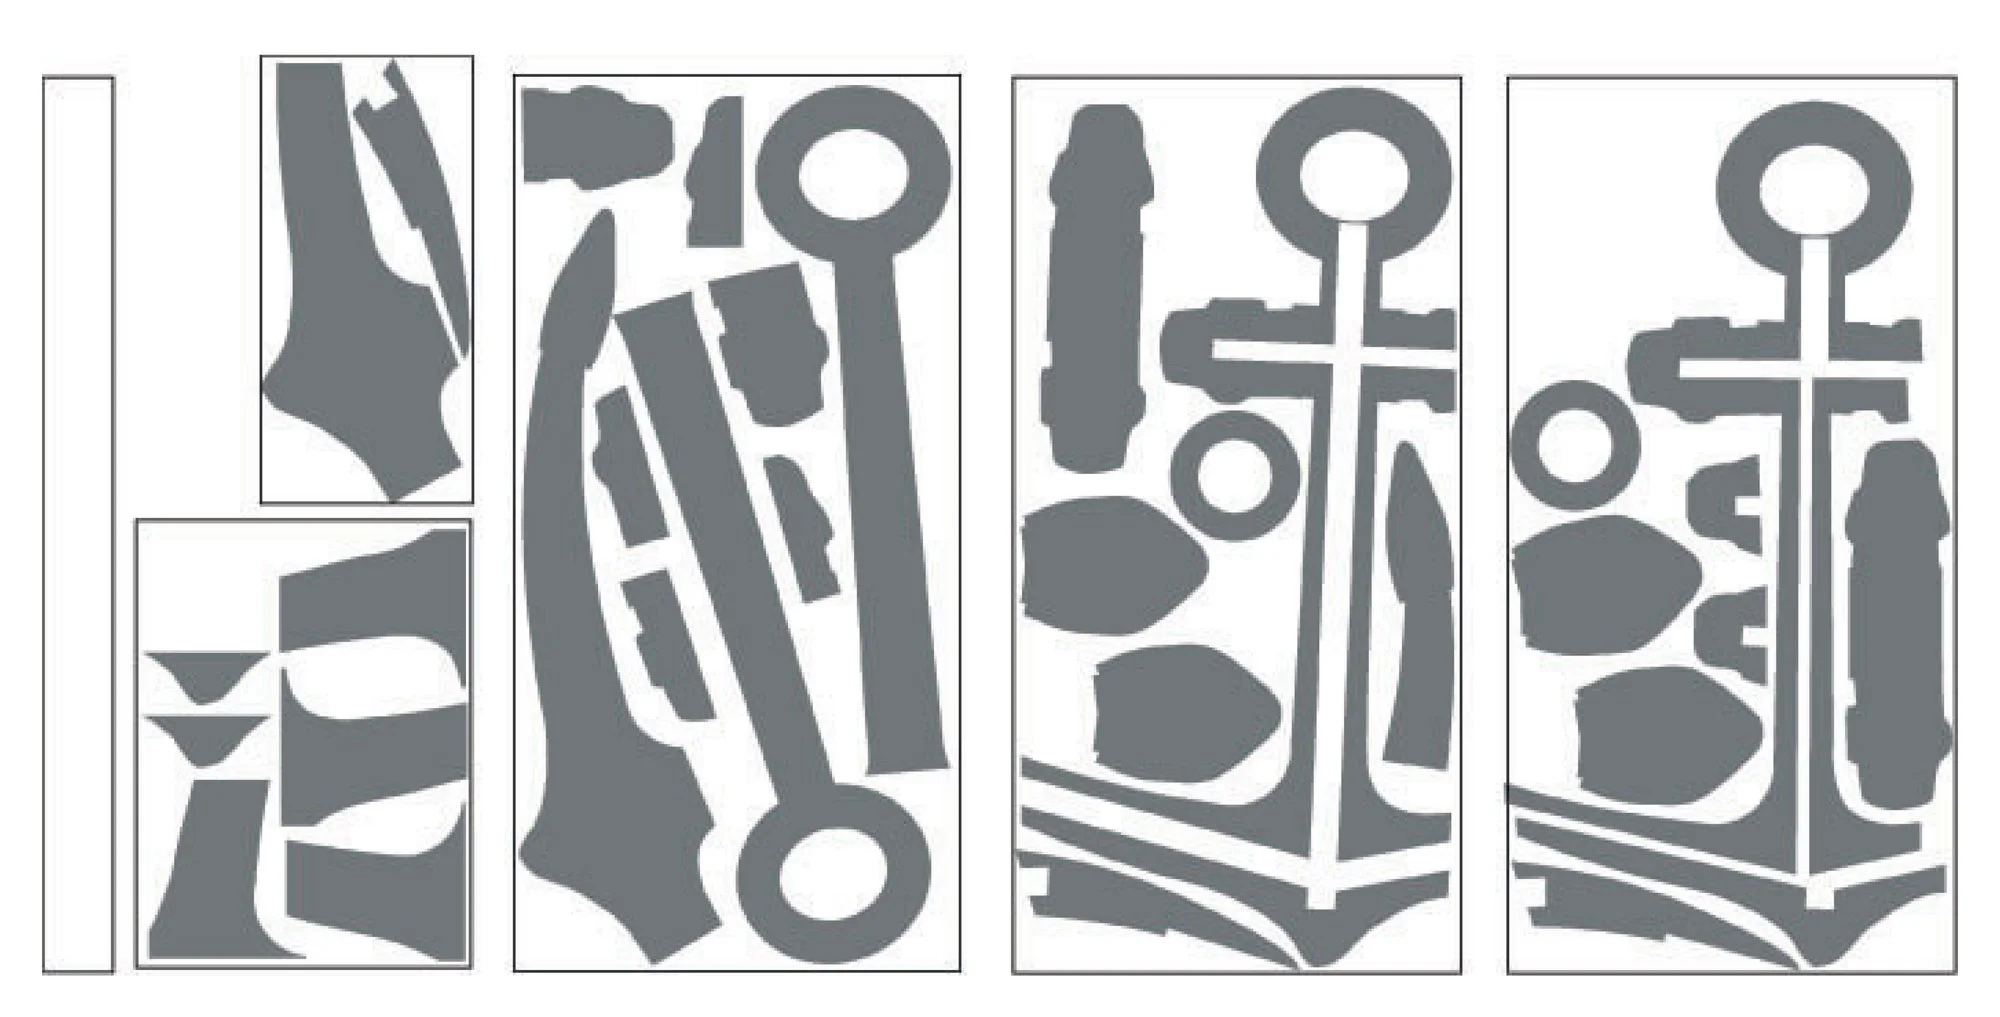
The next step was to create the cut files from the art I drew in Flexisign. I had to figure out how the anchor would mount on the building and digitally create the space in the art for the stainless steel tubing and internal framework. Then it was a matter of virtually cutting the file apart into the 1.5-in. slices to be cut on the CNC router from high-density urethane board.
The anchor is 8 feet tall and 10 feet wide. I distorted the anchor shape a little so that I would have the extra length to go through the building and still be in proportion.
It wasn’t until we took the die grinders and detail tools to the anchor that it started to come alive and look old and weathered. The more I beat it up, the better it looked. I usually work very hard to keep edges crisp and surfaces smooth, so it was a fun lesson to learn.
I built a life-size section of the wall and corner so that we could work out the illusion of the anchor coming through the wall. It had to look “right,” and I spent a lot of time adjusting it. I wanted it to not only look correct in place, but also be able to mount to the wall with stainless steel receiver plates and other anchor points, including the roofline. I thought it might need a faux rope created from twisted steel rod, but decided against cluttering it up.
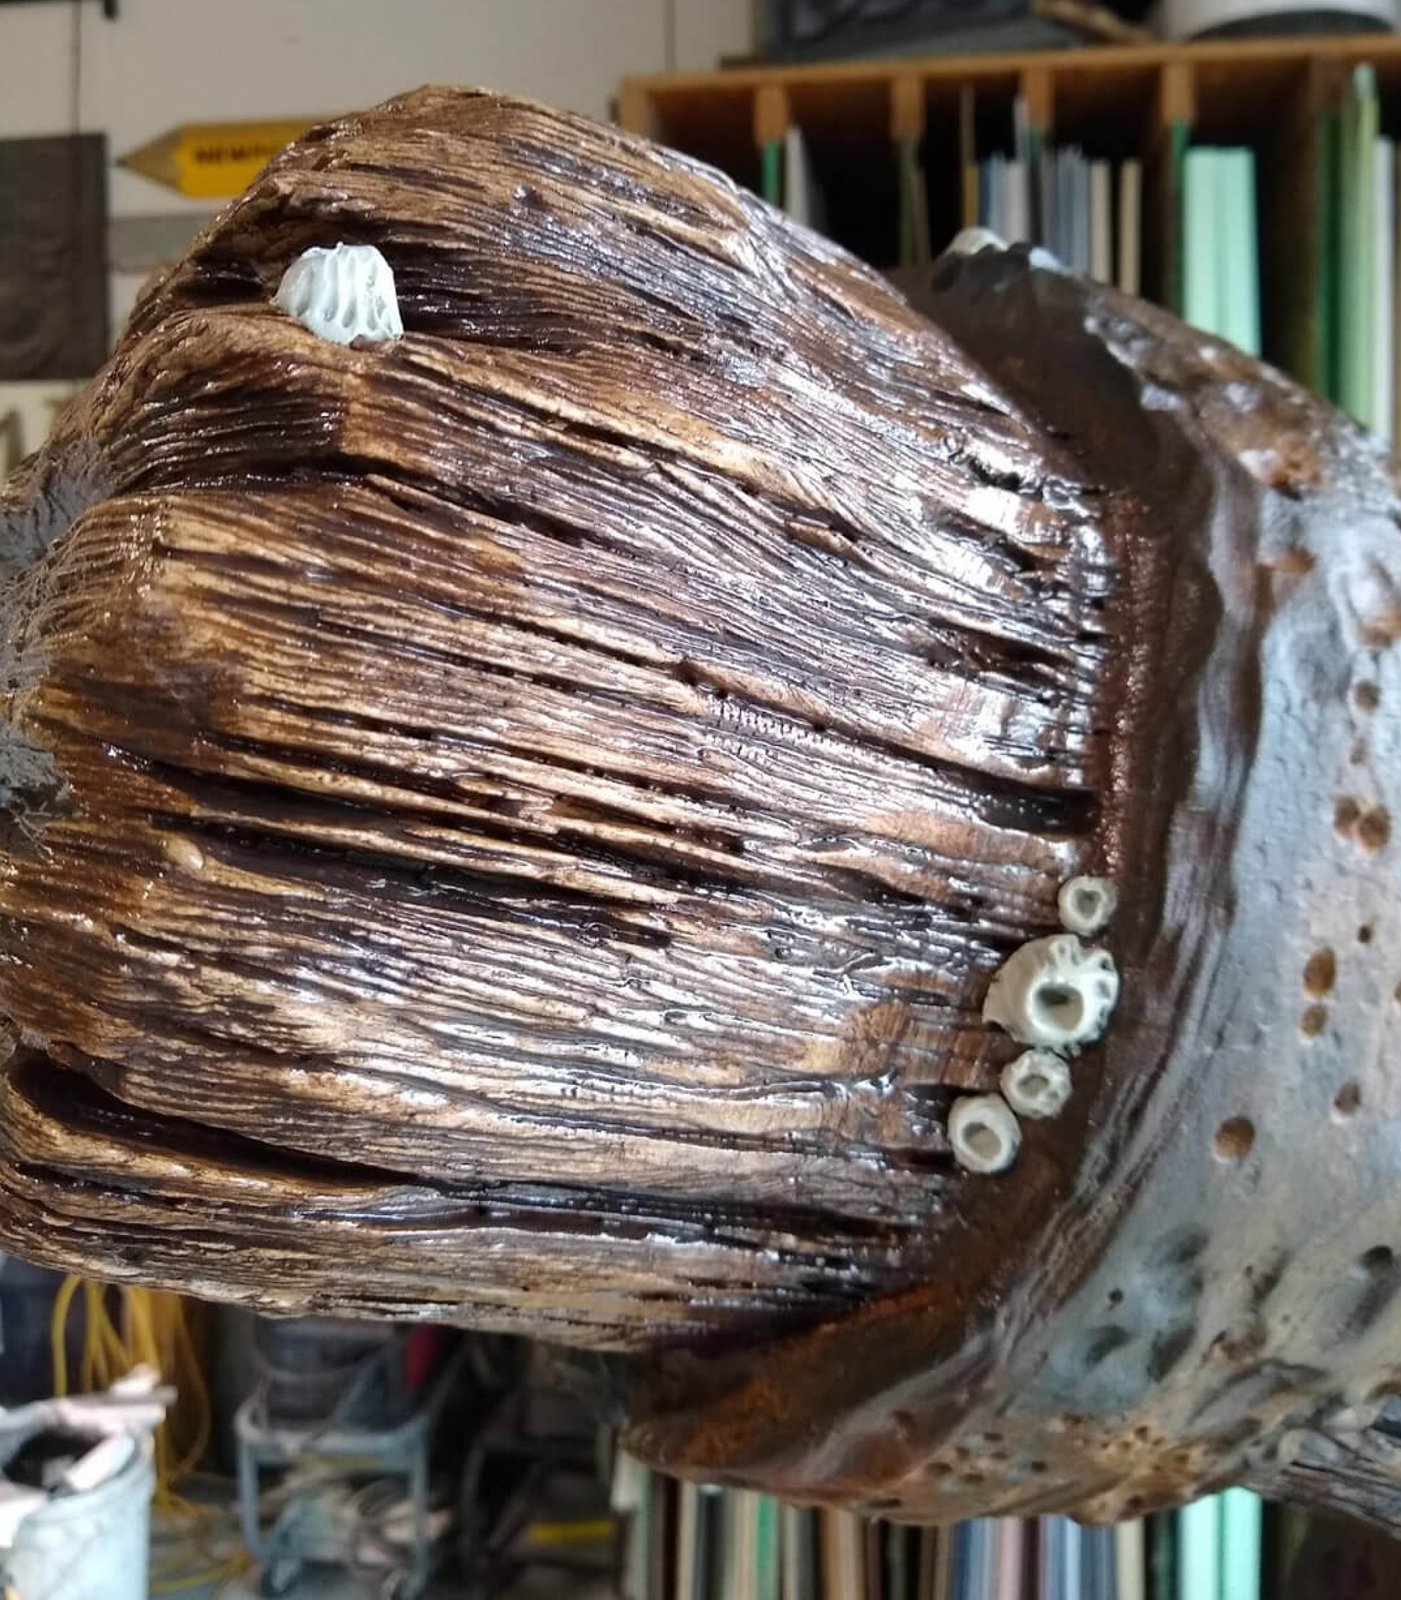
The “stock” or wooden crossbar was carved and wirebrushed to give it a weathered and rotten look, and then was painted with several layers of gradually darkening glazes to create depth. After clear-coating, it was time for a few fun details and the obligatory barnacles. We added a starfish to the spade of the anchor, which is visible from inside the restaurant.
A few years back, we lost a step ladder off of the dock while lettering a boat. A local diver retrieved it for us, only to find that it wasn’t ours. It was one that had been underwater in the bay for a while and was covered in barnacles. It was cool, but there were plenty of times we cut our hands on the damn thing. Now we’ve taken to covering our monitors, microwave, cabinets, and various tools with barnacles created with sculpting epoxy.
The install went smoothly, thanks to all the prep work. The stub of the anchor slides into a fitting on a 12-by-12-in. stainless steel receiver plates that were installed under the siding with a tubing stud sticking out. The anchor slid onto that, but not before installing a torn-looking piece of siding to create the illusion of the anchor crashing through the building.
Projects like this are a lot of fun and a nice break from the everyday commercial signs, too. They impress your customers even if they aren’t in the market for a dramatic piece of advertising.
The anchor has been up for three years now and is holding up extremely well. There is very little rust transference, and we’ve seen some big storms that didn’t affect it. All in all, I’m thrilled with the project, and so is my customer at Newport Brewing.
Ken Spencer’s shop, Newport Signs, is in South Beach, Oregon, and you’ll find him on Instagram as @newportsigns105.
Ken Spencer
© Copyright 2019 SignCraft Publishing Co., Inc.